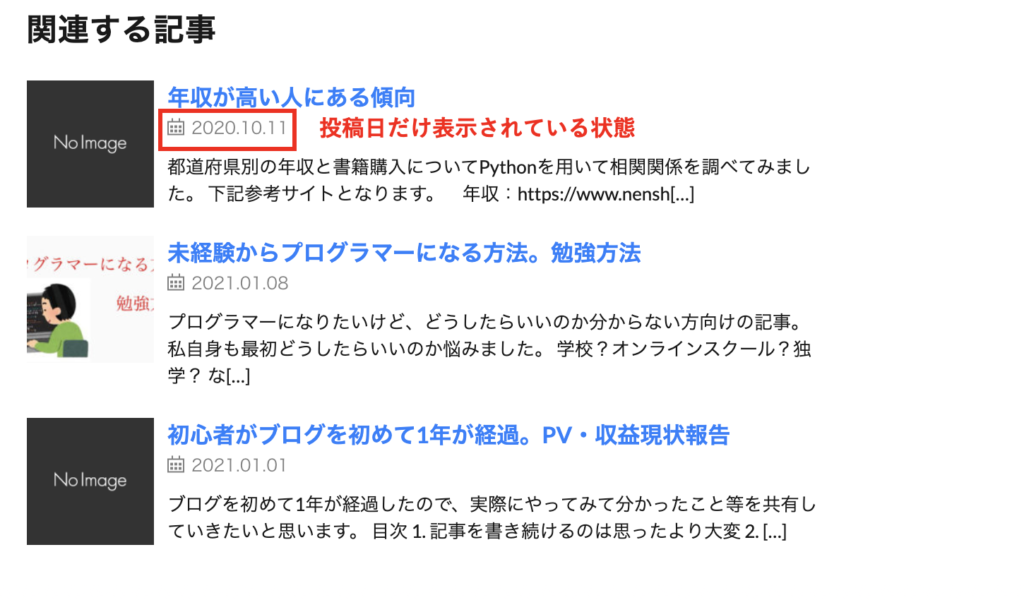
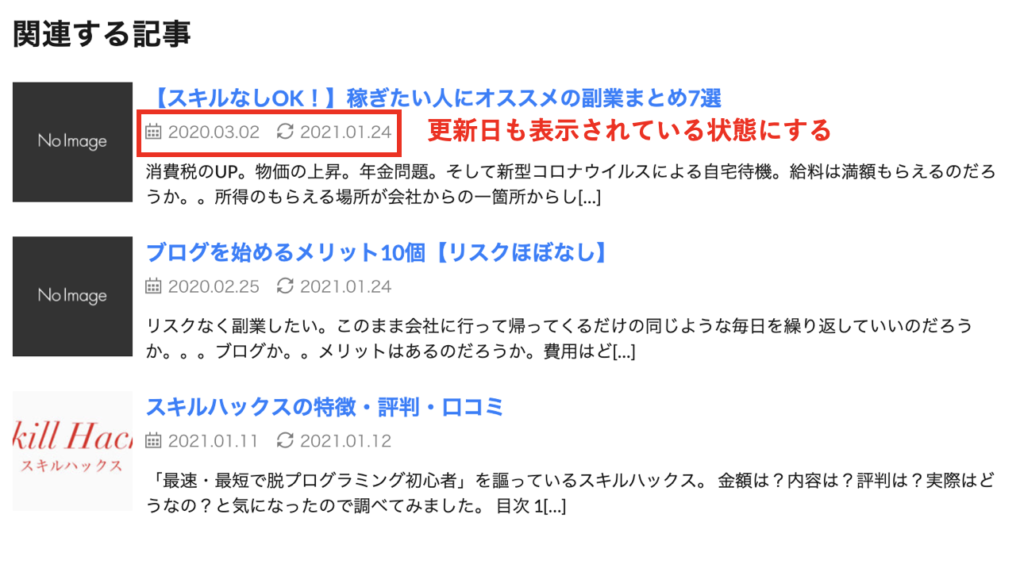
初期のLION Mediaの状態は投稿日だけ表示されている状態です。

その設定を変更して、更新日も表示されている状態にしたいと思います。
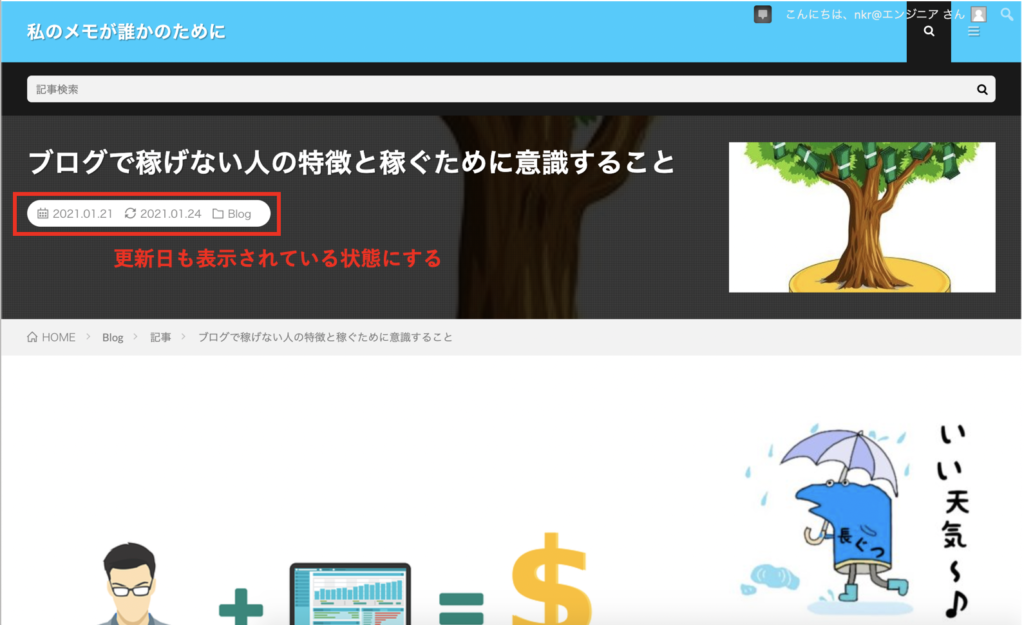
投稿日しか表示されていない状態ですと、せっかく記事の更新をかけても記事が古い状態に見えます。
更新日も表示されていた方がいいと思うので、やり方を調べてやってみたのでこちらにまとめておきます。
こちらの記事でできることは
- アイコンの追加
- CSSの編集
- PHPの編集
- 記事の更新日の表示
- 関連する記事の更新日の表示
- カテゴリの最新記事の更新日の表示
です。
アイコンの追加
アイコンのダウンロード
デフォルトに更新マークがないため、アイコンを追加したいと思います。
zipデータをダウンロードしてください。
ダウンロードしましたら、解凍までしてしまいましょう。
ファイルアップロード
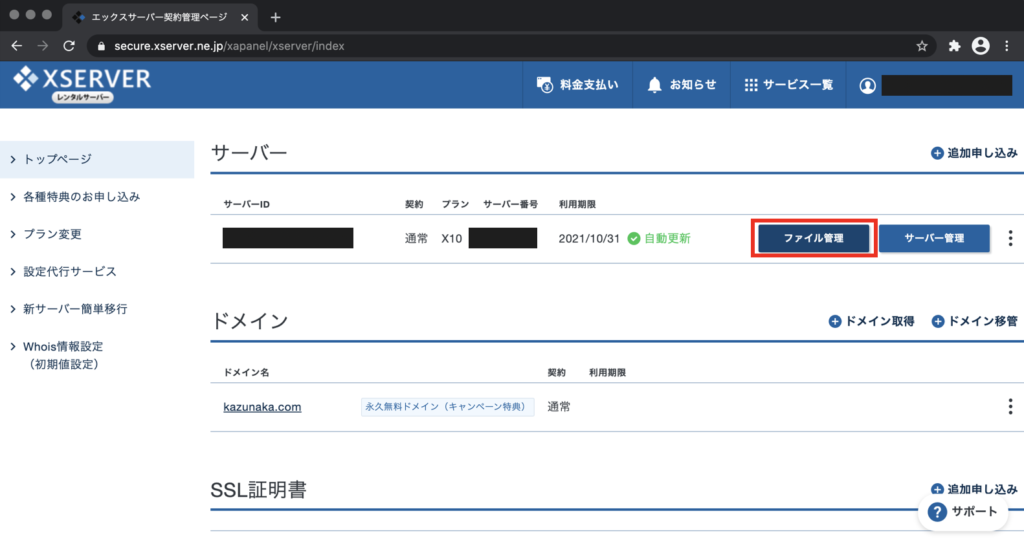
xserverにログインします。
ファイル管理をクリックします。
my_domain.com/public_html/wp-content/themes/lionmedia とファイル移動します。
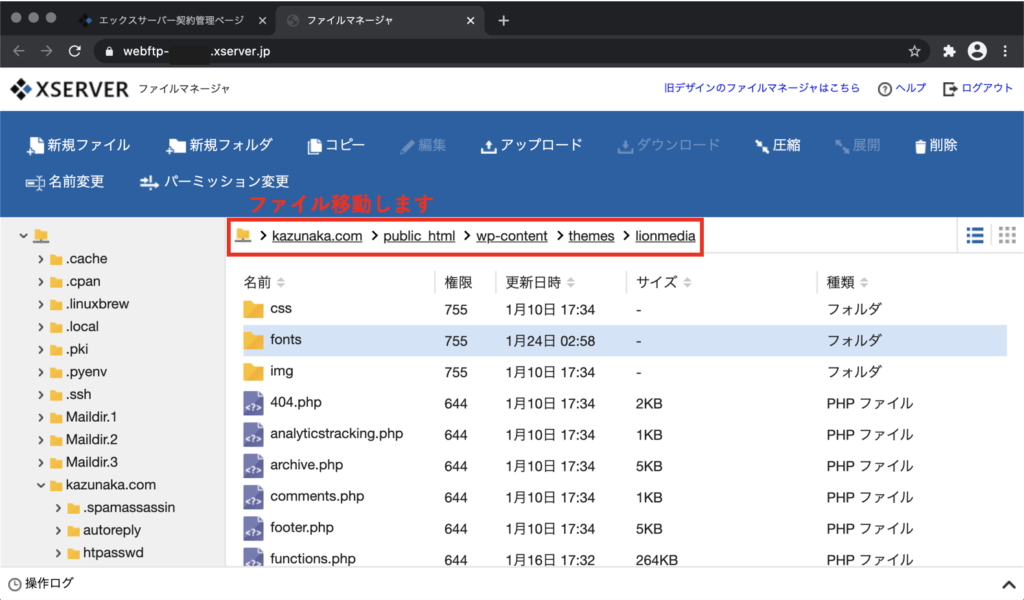
fontsを編集するのですが、ファイルの中身を念のため取っておきたいので圧縮して置いておきます。

tmp_fontsと入力して、圧縮をクリックしましょう。
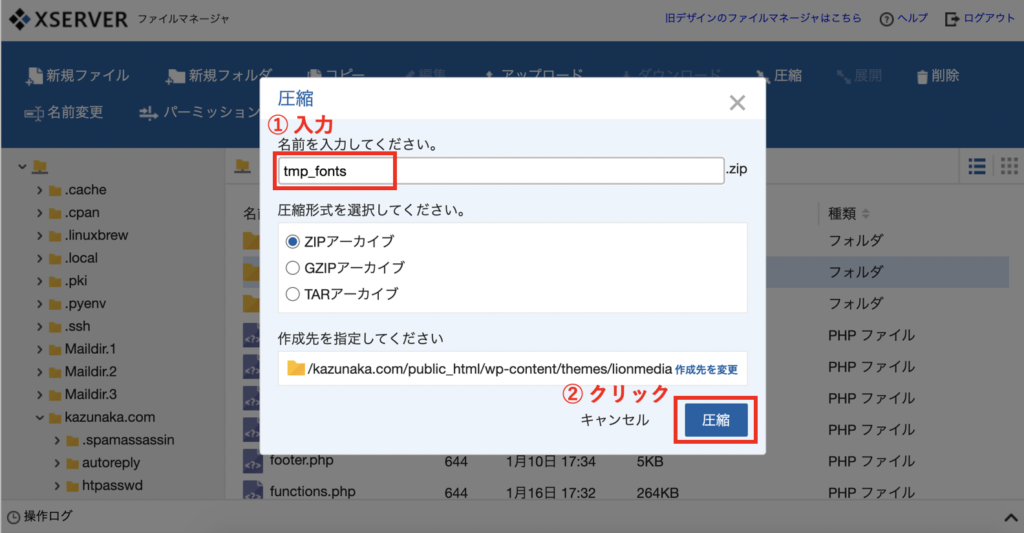
フォルダの一番したにtmp_fonts.zipができたと思います。
これで何かあれば復元できます。
fontsのフォルダの中に移動して、ファイルを全て削除します。
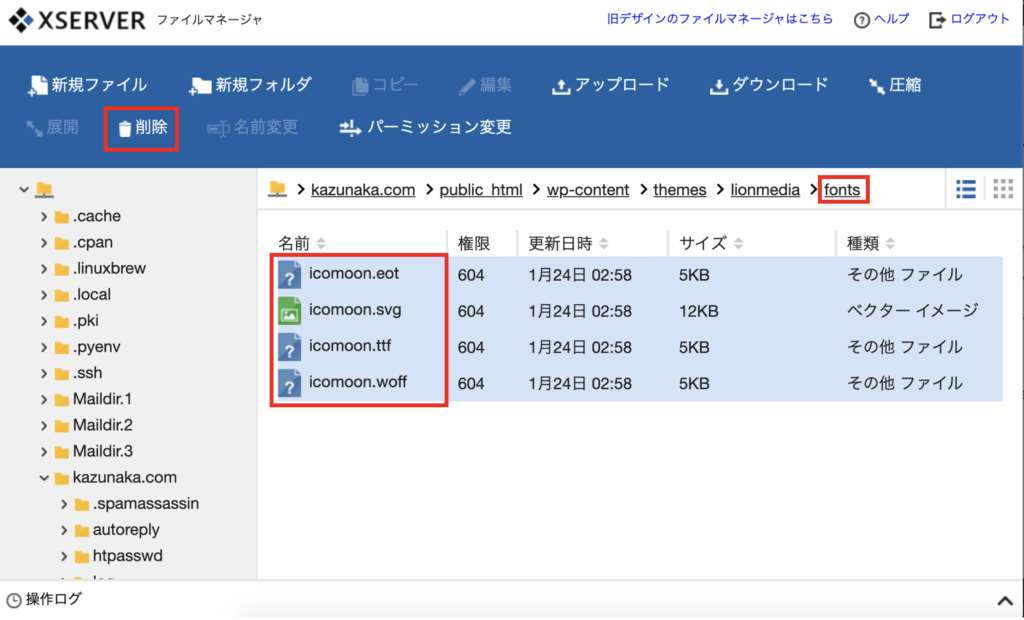
zipファイルでパックアップを取ってあるので、完全に削除で問題ないです。

先ほどダウンロードして解凍した、fontsフォルダを開いて
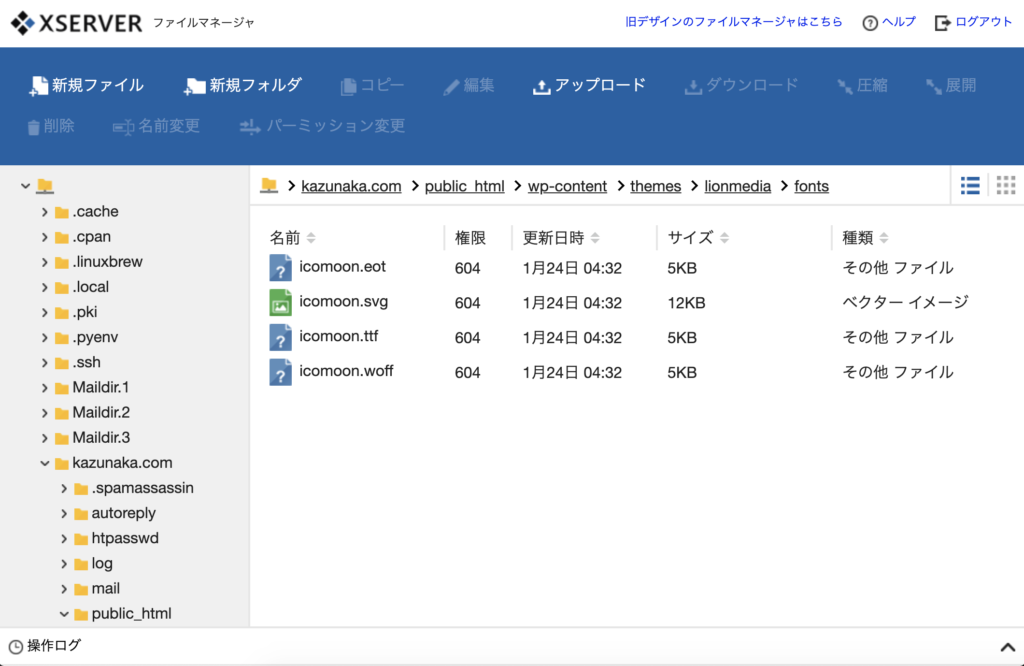
4件のファイル選択してドラッグ&ドロップでアップロードしましょう。

ファイル4件が無事反映されたらOKです。
LION Mediaに移動
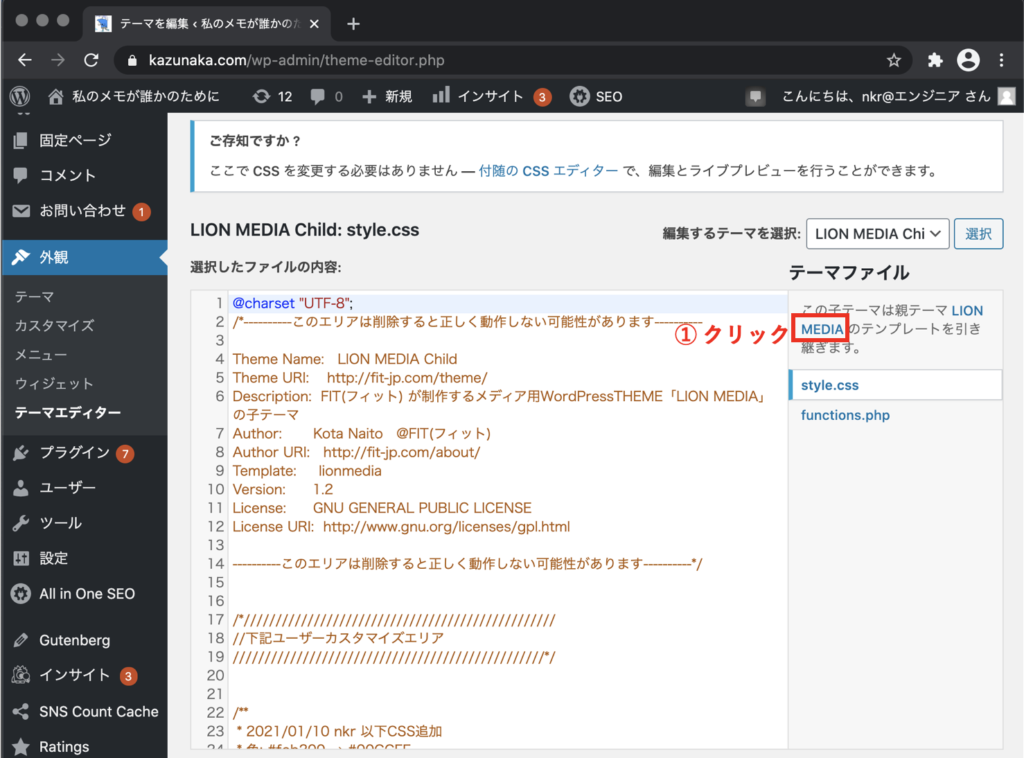
ワードプレスのダッシュボードから外観 > テーマエディタ を選択します。

親テーマのLION MEDIA へ移動します。
CSS
cssの編集もxserverの方からできますが、
どの行を編集しているのか見えたほうがわかりやすいので、ワードプレスの方で編集していきます。
cssファイルを直接編集するので、慣れていない方は先ほど上のほうでサーバーでのファイル管理でtmp_fonts.zipを作成したように編集するフォルダのzipを作成してバックアップを取っておくことをオススメします。
いっそlionmediaのフォルダをzipで取っておけばいつでもすべて復元可能です。
icon.css
icon.cssの編集です。.icon-loop:before {content:”\e910″;} の行を追加します。
ついでに27行目~42行目の順番が気になったので、
e90a, b, c…f、 e901, 2, 3 …10と並ぶように編集しました。
.icon-line:before {content:"\e90a";}
.icon-pocket:before {content:"\e90b";}
.icon-hatebu:before {content:"\e90c";}
.icon-instagram:before {content:"\e90d";}
.icon-close:before {content:"\e90e";}
.icon-menu:before {content:"\e90f";}
.icon-calendar:before {content:"\e900";}
.icon-facebook:before {content:"\e901";}
.icon-folder:before {content:"\e902";}
.icon-google:before {content:"\e903";}
.icon-home:before {content:"\e904";}
.icon-rss:before {content:"\e905";}
.icon-search:before {content:"\e906";}
.icon-tag:before {content:"\e907";}
.icon-twitter:before {content:"\e908";}
.icon-quotation:before {content:"\e909";}
.icon-loop:before {content:"\e910";}
content.css
content.cssを編集します。
660行目付近に1行追加します。
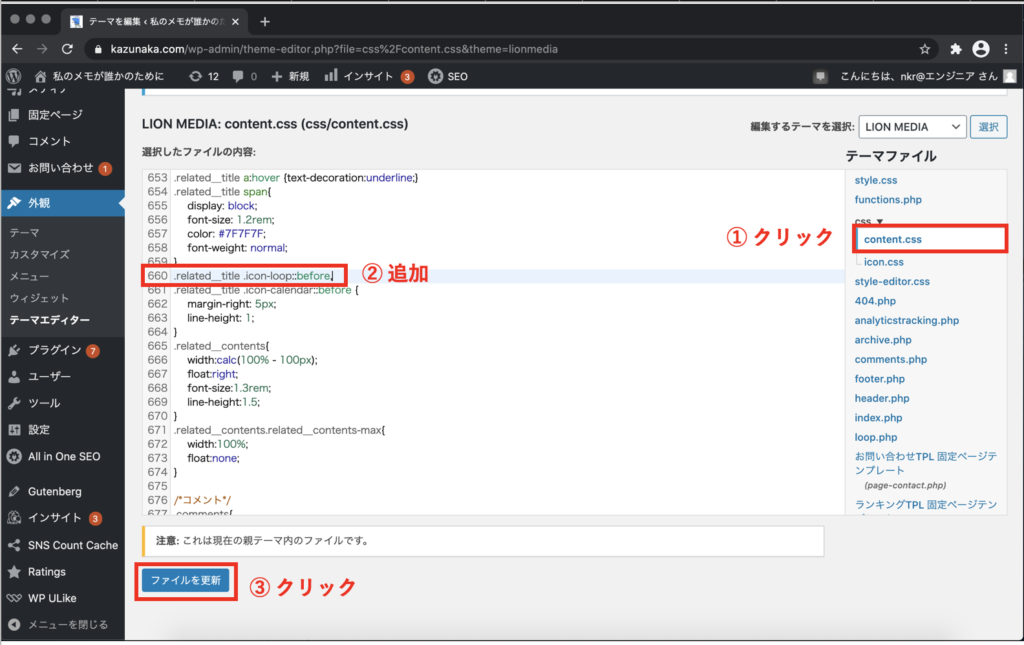
/* 追加ここから */
.related__title .icon-loop::before,
/* ここまで */
.related__title .icon-calendar::before {
    margin-right: 5px;
    line-height: 1;
}
PHPファイルの編集は気をつけよう
php編集にてコードエラーを起こすとワードプレスでの記事が動かなくなります。
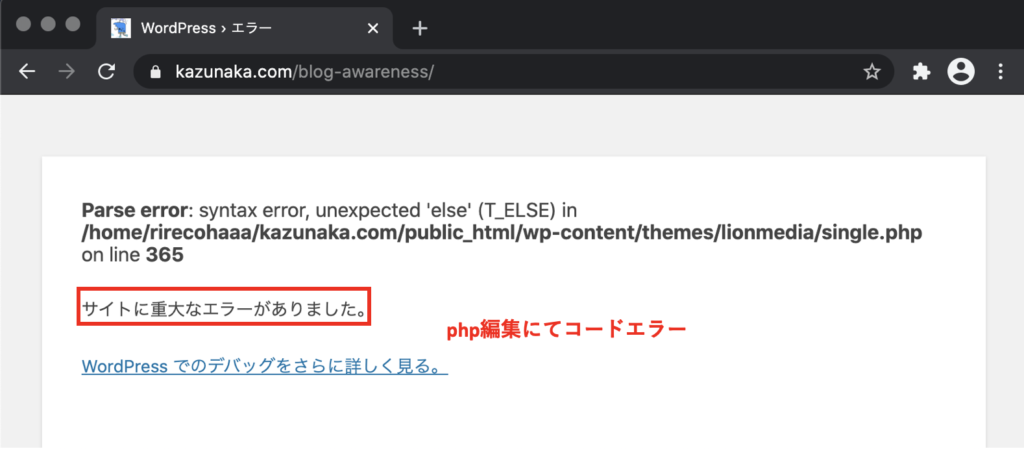
cssは編集に失敗してもCSSの表示がされないだけですが、
phpファイルは編集に失敗すると、エラーが表示されたり、ワードプレス自体が動かないこともあります。
慣れていない方は、先ほど上の方でサーバーでのファイル管理でtmp_fonts.zipを作成したように
編集するフォルダのzipを作成して取っておいたり、編集する前にテキストをコピーしてローカルに保存しておくなどバックアップを取っておくことを強くオススメします。tmp_lionmedia.zipを作っておきましょう。
個別投稿に更新日を追加で表示
single.phpを編集します。51行目あたりを改行して
更新日が表示されるようコードを追加します。
日付の追加コメントはお好みで。。
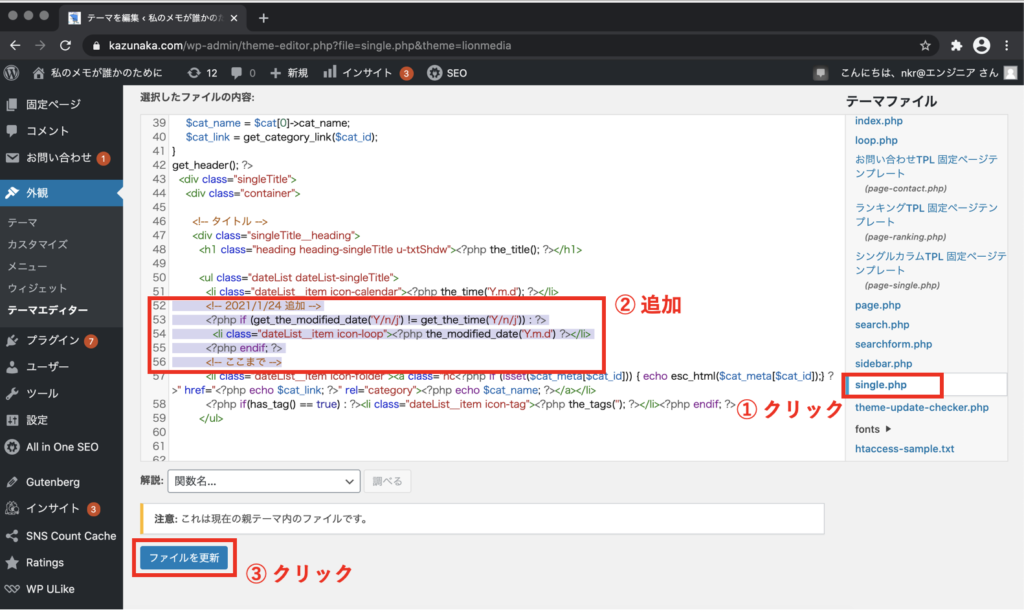
          <!-- 2021/1/24 追加 -->
          <?php if (get_the_modified_date('Y/n/j') != get_the_time('Y/n/j')) : ?>
            <li class="dateList__item icon-loop"><?php the_modified_date('Y.m.d') ?></li>
          <?php endif; ?>
          <!-- ここまで -->
動作確認
あとは記事を編集してみて、更新日が表示されるかを確認してみてください。
表示されない場合は、スーパーリロード(Shit + command + R)してください。
エラーが表示された場合はコードの見直しをしましょう。
コードの打ち間違えや入力する場所が違う可能性があります。
関連する記事の投稿日を追加で表示
こちらも更新日が表示されている状態にしましょう。
LION Mediaのテーマファイルのsingle.phpの編集をします。
359行目付近の <h3></h3>の中身を編集します。
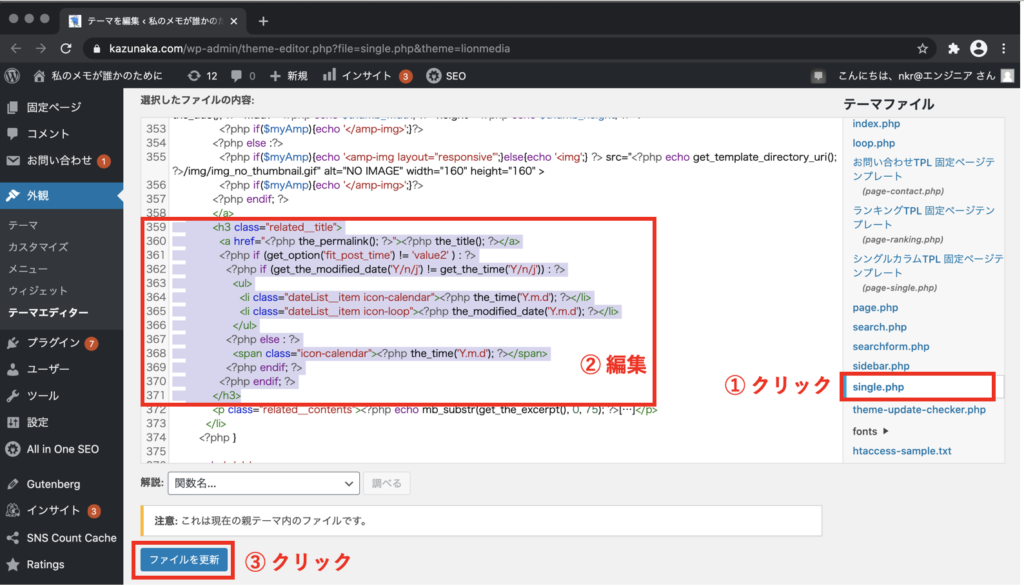
今回は追加でなく、編集なので<h3></h3>の中身を消して、コピペで貼り付けてください。
	        <h3 class="related__title">
	          <a href="<?php the_permalink(); ?>"><?php the_title(); ?></a>
	          <?php if (get_option('fit_post_time') != 'value2' ) : ?>
	            <?php if (get_the_modified_date('Y/n/j') != get_the_time('Y/n/j')) : ?>
	              <ul>
	                <li class="dateList__item icon-calendar"><?php the_time('Y.m.d'); ?></li>
	                <li class="dateList__item icon-loop"><?php the_modified_date('Y.m.d'); ?></li>
	              </ul>
	            <?php else : ?>
	              <span class="icon-calendar"><?php the_time('Y.m.d'); ?></span>
	            <?php endif; ?>
	          <?php endif; ?>
</h3>コードを編集しましたら、更新日が表示されているかをスーパーリロード(Shit + command + R)で確認しましょう。
カテゴリの最新記事の更新日を追加表示

こちらも更新日が表示されている状態にしましょう。

LION Mediaのテーマファイルのsingle.phpの編集をします。
460行目付近に行を追加します。
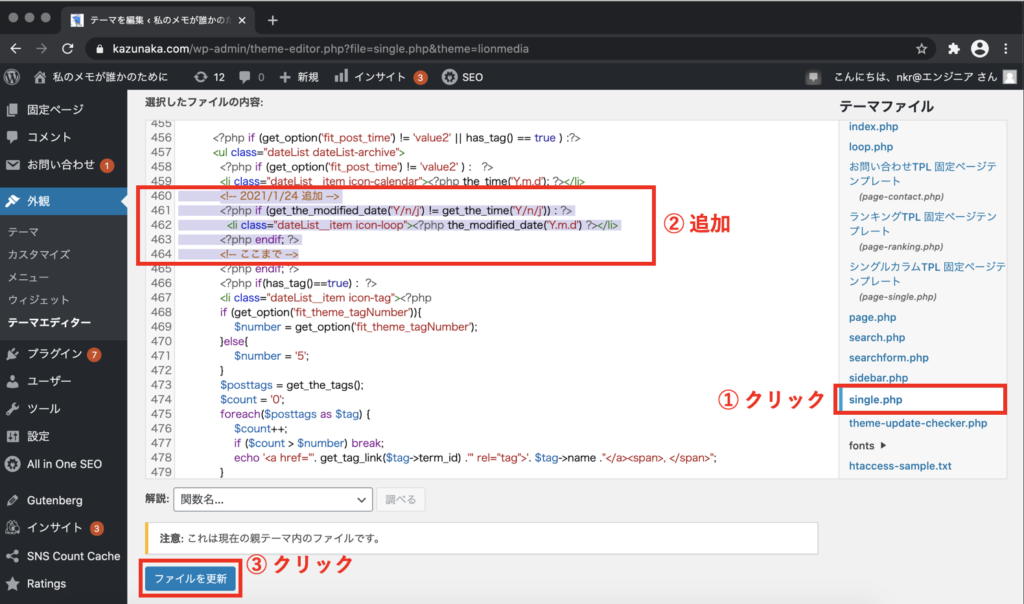
            <!-- 2021/1/24 追加 -->
            <?php if (get_the_modified_date('Y/n/j') != get_the_time('Y/n/j')) : ?>
              <li class="dateList__item icon-loop"><?php the_modified_date('Y.m.d') ?></li>
            <?php endif; ?>
<!-- ここまで -->コードを編集しましたら、更新日が表示されているかをスーパーリロード(Shit + command + R)で確認しましょう。
まとめ
更新日追加の作業はこれで以上になります。
single.phpを編集を1回でやることもできますが、
万が一動かなくなった場合、目処が立ちやすいようひとつずつ編集しました。
個人的には新しい記事を読みたいので、いつの記事なのか更新日はいつなのかは重要なので、
うまく表示されるようになってよかったです。(デフォルトで表示されていてほしかった。。)
こちらの記事でスムーズに更新日が表示されるようになれば幸いです。


コメント